
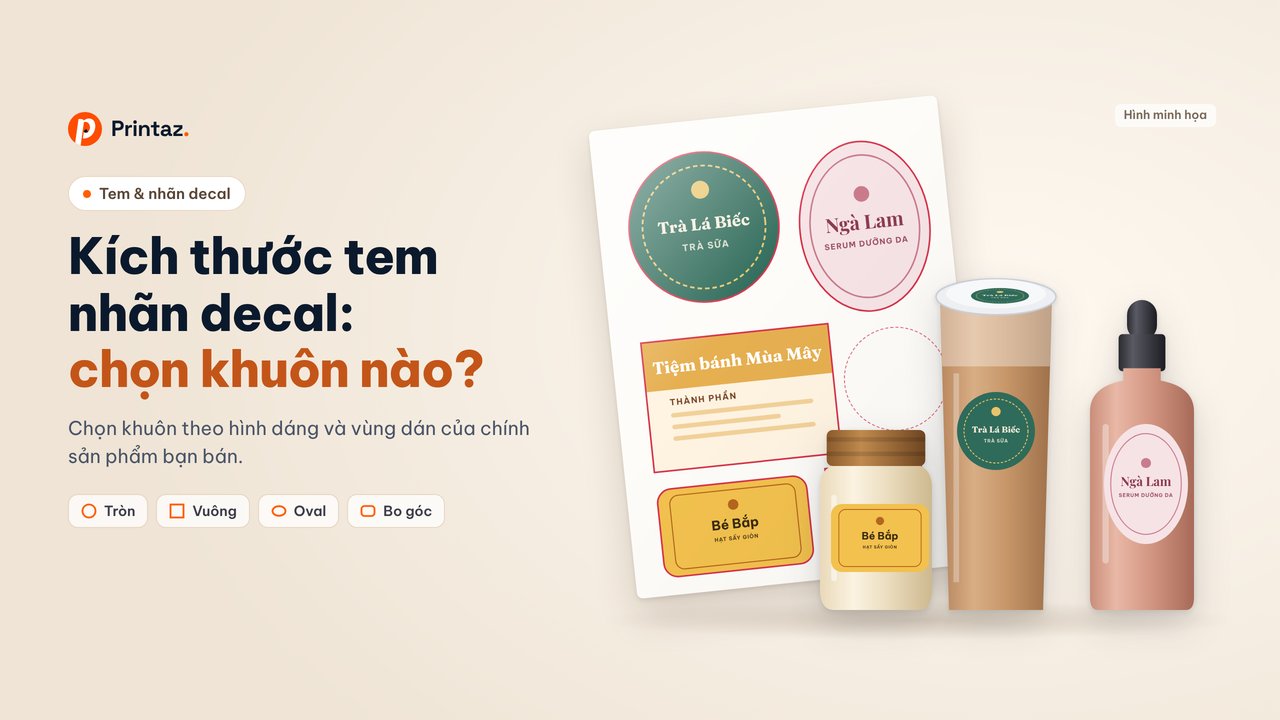
Decal label sizes: which die-cut fits your product?
Common decal label shapes, real sizes in the Printaz template library (35×35 to 100×140 mm) and how to measure your product before ordering labels.
You have a new logo and you have picked your brand colors, but when it is time to print decal labels you get stuck on the simplest question: what size should the label be? Too big and it wrinkles at the edges on a curved bottle; too small and customers cannot read the product name. Choosing the wrong label size and die-cut shape is the most common reason an entire batch of labels has to be reprinted.
This post covers the common decal label shapes, the real sizes currently available in the Printaz template library, how to measure for your actual product, and a checklist to run before you order.
What is a die-cut, and why does it decide the label size?
The die-cut is the cutting line that defines the final shape of the label: round, square, rounded rectangle, oval or a custom shape following your logo. After printing, labels are cut along this line, so all text and logos must sit well inside the shape, away from the cut line.
Choosing the die-cut first and designing second helps you:
Avoid stretching or squeezing the layout after the design is done.
Know exactly where the safe area is for text and logos.
Avoid labels that look great on screen but end up crooked or folded at the edges on the product.
Common decal label shapes
Each shape suits a different kind of product. The list below is a starting suggestion, not a mandatory standard:
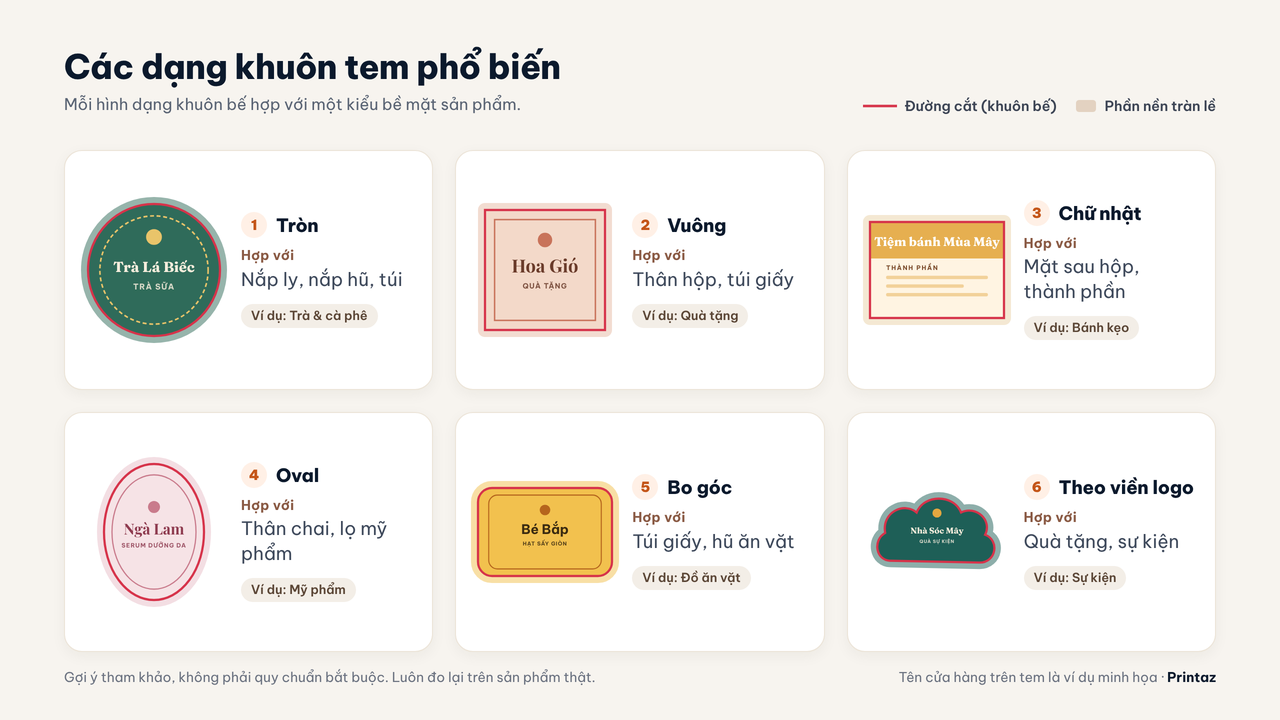
Round labels: good for cup lids, jar lids and bag seals; suit balanced, symmetrical logos.
Square or rounded-rectangle labels: good for box panels, paper bags and back labels that carry a lot of information (ingredients, expiry date, barcode).
Oval labels: good for bottles and cosmetic jars; the tapered shape follows curved surfaces better.
Long strip labels: wrap around cups and jars, or seal a box lid.
Logo-shaped labels (contour cut): add a highlight for gifts and events; best when the logo has a clear outline.
Hang tags: upright rectangular tags for clothing and accessories.
Label sizes available in the Printaz template library
Instead of guessing, you can start from the sizes already available in the Printaz labels & stickers template library. Each template is already placed on a die-cut of the exact size shown on its template page:
35×35 mm: Mid-Autumn sticker for a kindergarten.
50×50 mm: the most common size in the library, for example Thank-you-for-your-order sticker, Round Vietnamese food label for boxes and Floral ring wedding sticker.
60×60 mm: Snack shop label.
40×60 mm: Traditional bún chả label and a kids' clothing hang tag.
40×70 mm: clothing hang tags such as the Green Love hang tag.
100×140 mm: large labels for snack bags such as the Xinjiang red date label and the Vintage dried banana label.
The library does not yet have oval bottle labels or wrap-around strip labels for cups and jars. For these, measure directly on your product instead of relying on a generic number.
How to measure label size on your actual product
Do not guess the label size from sample photos online. Even when you use a ready-made size, measure on the product you actually sell to make sure it fits:
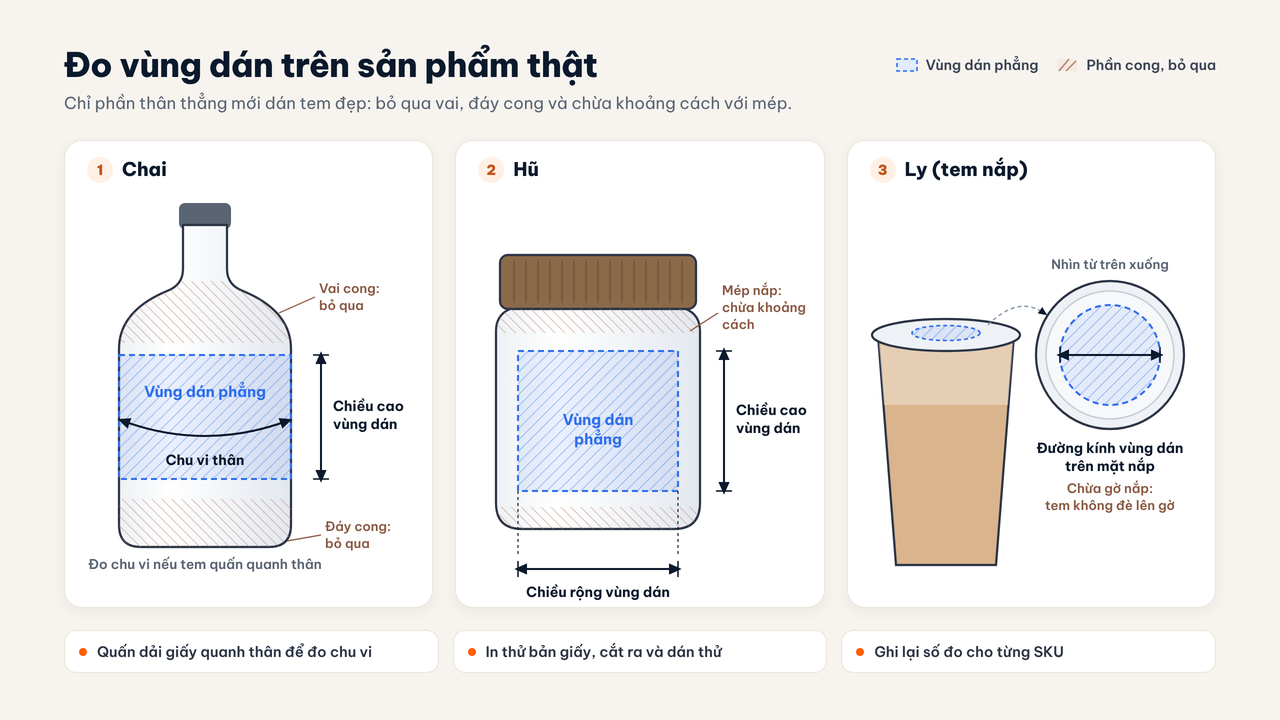
Find the flat application area: on a bottle, jar or cup, measure the height of the straight part of the body, ignoring the curved shoulder and base.
Measure the circumference for wrap-around labels: wrap a tape measure around the body, then subtract a little so the two ends of the label do not overlap.
Measure the lid diameter: for round labels on cup or jar lids, measure the flat top of the lid and compare it with the 35×35 mm, 50×50 mm or 60×60 mm sizes to see which fits.
Leave a gap from the edge: labels placed right at the edge of a lid or base peel off easily.
Test with plain paper: print a draft at the exact size, cut it out and stick it on.
Record the measurements for each SKU so you do not have to measure again next time you order.
Design inside the die-cut's safe area
Once you have the die-cut, the rest is placing content correctly:
Safe area: keep text and logos a small distance from the cut line, because the cutting die can shift slightly.
Bleed: extend background colors or images past the cut line so no white edge shows after cutting. See more on bleed and DPI in Print file checklist: PDF, CMYK, DPI, bleed.
Font size: a small label should carry only the brand name and one key piece of information. Do not turn a 50×50 mm label into an information sheet.
Reading direction: on wrap-around bottle labels, put the product name where customers look first.
On Printaz, you pick a template already placed on a die-cut of the right size and edit it directly on the web, no professional graphics software needed. Then use the 3D preview to check the layout with the label on the product. Note: the 3D mockup helps you visualize shape and layout; actual print colors may differ from the screen. Before sending files, it is still worth checking them yourself with What do printers check in the files customers send?.
Choose the decal material by size and environment
The right size with the wrong material still makes a bad label:
Cold products with condensation (iced drinks, juice bottles): choose a moisture-resistant decal.
Strongly curved surfaces, large labels: flexible materials hug the surface better.
Want customers to see the product inside: consider a clear decal.
Choosing label materials: paper, plastic, or clear? and Paper vs plastic labels: when to choose which? go deeper into this topic.
Checklist before ordering labels
Measured the application area on the real product, not guessed from a photo.
Chose a die-cut shape that suits the surface (flat, curved, lid).
Printed a paper test and stuck it on the product.
Text and logos sit inside the safe area, away from the cut line.
Edge-to-edge backgrounds have bleed.
Checked the spelling of the product name and phone number; test-scanned the QR code.
Chose the material for the conditions of use (cold, humid, curved).
Frequently asked questions
What is the most common decal label size?
There is no single right size for every product. In the Printaz template library, 50×50 mm is the most common size for stickers and round labels, clothing hang tags are usually 40×70 mm or 40×60 mm, and large labels for snack bags are 100×140 mm. The surest way is still to measure the application area on your own product.
Can I print a small number of labels to test the size?
Yes. Printaz has no MOQ and prints from a single order, so you can print a few to check size and material before printing in volume.
I can't use Illustrator. Can I still make my own labels?
Yes. Pick a template already placed on a die-cut and design right on the web. See also Cup labels for cafés and bubble tea shops without Illustrator.
Can the 3D preview replace a print test?
Not entirely. The 3D mockup helps check layout and shape, but actual print colors may differ from the screen. If your brand color matters, print a few first.
Start with a label die-cut of the right size
Choosing the right die-cut from the start saves you from reprinting a whole batch of labels. Pick a label template on a die-cut, edit it on the web, preview it in 3D, then order and get a quote right in the app.
Get a quote: request a quote right in the app.
Email: [email protected]
Share this article